Monday, December 23, 2019

Updating the Dodger - Front Window Panel - Wrong

I screwed up the Front Window

When I made the template, it consisted of three parts: The Top and the Front Window, and the two sides. I made the Top and the Brow (the strips that extend from the Top to the forward lower edge of the Front Window and I made the Front Window from that same template. But, somehow, I screwed it up. The Front window had more buckles in it than Blackbeard's Belt. At least it seemed to fit and I was able to attach it to the Top and Brow with the zips and I made marks on the strataglass where it needed trimming. 

It only took about two hours to trim the window and resow the edges along the top and sides and to make an extension for the front lower edge that snaps to the cabin top.. Back down to the boat for a 2nd fitting. Wow! It's worse! Back to the drawing board.

I made a new template using some more Dura Skim, with basting tape and painters tape on the canvas sides around the window and along the cabin top. 

Back home, I laid the new template over the 1st attempt at the front window. Wow again! The new template is about 2" wider than the original. That means that I cannot use the piece of Stataglass for the window, it's too narrow - Grrrrrr! But luckily, I had ordered 3 sheets of Strataglass thinking that I would need one for each side window, however, I was able to make the two side windows out of a single sheet. I had hoped that I could return the 3rd sheet, but now it turns out to be a good thing that I had it.

I sewed the zips to the new template and took it back to the boat, seems to fit a whole lot better but needs some tweaking. The corners need to be adjusted.  I made the adjustment with a sharpie marker on the template material, and I did not have total confidence that the template was as good as it could be, I also unstitched the zippers and attached them with a 2nd layer of basting tape. Back to the boat - I feel that it's better to repeat the fitting rather than blow another $220 on a 4th sheet of Strataglass.

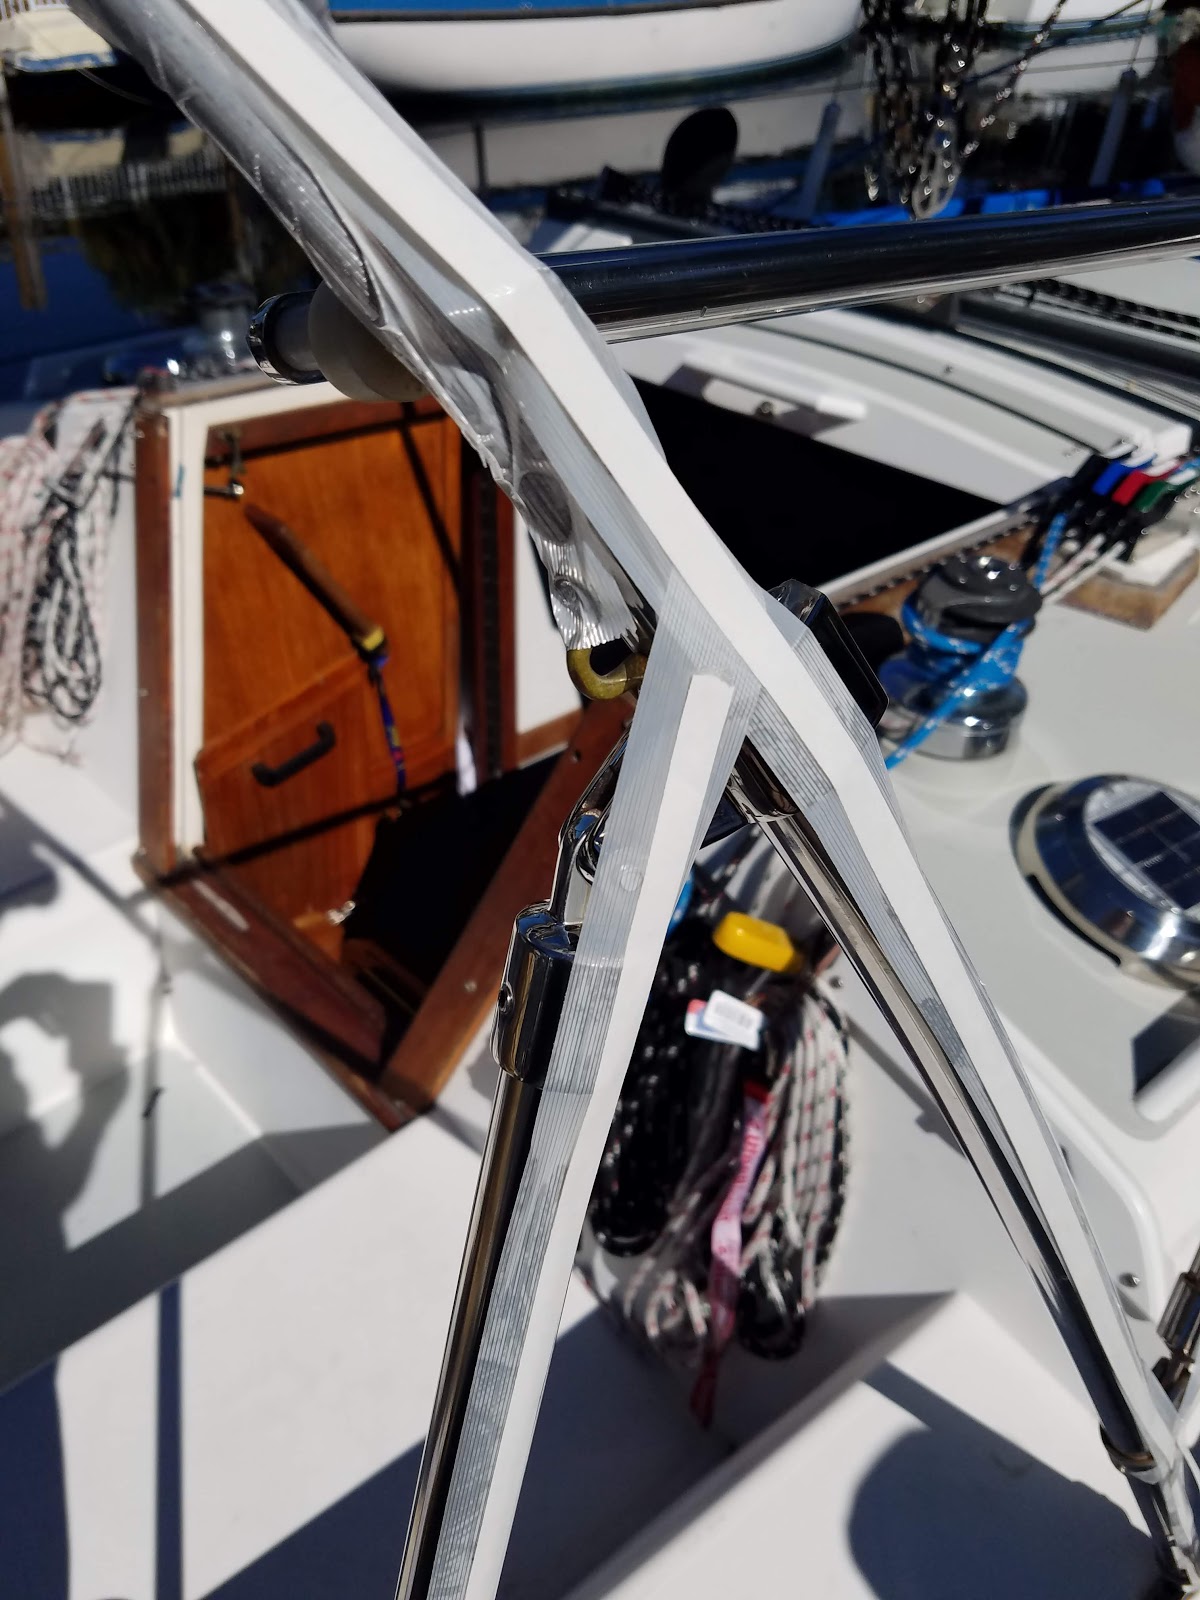
Now, with the template marked up and the zippers attached with basting tape, back to the boat again. This time it's looking a lot better, not perfect, but a lot better. The big challenge is to keep tension at the lower edge of the window panel while checking the position of the zippers against those that are already sewn to the Brow. This is where I had a brainwave. I tried to use a snap to hold the template
temporary Snap-rite socket being used to
hold the template against the ridge on the Cabin top
in position against the studs that are in the ridge of the cabin top, this is where the front lower edge of the window will finally be attached to the cabin top. Using just the Socket part of the snap, I was able to push it over the template material and onto the snap bases afixed to the cabin top. Awesome!

With the lower edge neatly fixed in place, albeit temporarily, I was able to mark up the top edge and corners of the window template, the sides were ok.

Back home again, my car knows the way to the boat too well.

And that brings me to tonight.

It's the night before Christmas eve. We're taking the boat out on Monday, December 30th to Lake Boca where we'll celebrate New Years with out sailing club. And the window has to be done before then. So, tonight I'm sewing the zippers on the adjusted template and hope to take it down to the boat in the morning. Sure hope it fits just right this time. Assuming it does, I have Friday, Saturday and Sunday to get it finished. No pressure!


Thursday, December 12, 2019

Updating the Dodger - Making the Side Windows

Making the Dodger Side Windows

The side windows are pretty simple, no curves, so should be easy.

Side Window Layers
Top covers both the top and forward turn down to the Lower Section

The new template was easy to follow, and I quickly made the side window lower section using the same layers as the Front Window


There are the Port and Stbd side window sections.

The shelter rite is glued (basting tape) to the back of them.

The cut out for the Shore Power Receptacle is not cut out yet.

Sorry about the blurry image, I need to work on my camera skills using the new Action Camera.

Of course, nothing goes that easy and the Sewing Machine spring cover for the Bobbin holder got dinged and screwed up all of the sewing on the first stitch. Luckily, I had a spare spring cover.

The only variation I made to the Layers, was to add binding to cover the zipper edge before adding the zipper, it just made the whole edge look a lot neater.

Note: I have ordered an additional 100' of 1 1/4" Bias Binding tape due to another underestimate. What do they say? 'Measure Twice, Cut Once' well, 'Measure twice and order once'!

One thing I thought I had covered was Basting Tape, I always keep a couple of 50' rolls on hand, and ordered 4 more for this project. Duh! I'll order 10 which should keep me going for a while.

The side windows were made in two sections: The lower Section (Sunbrella & Shelter-rite) with binding completed on the top edge. And the Window glass, cut to size and then glued to the lower section with basting tape, that's 2 rows - that's what I had not considered when figuring the amount of basting tape. And of course, the Zippers.

I'll re-calc the total material used when finished. It's the little things that make a big difference when there's lots of them.

We took the Top, Front Window and the Port side window down to the boat for a test fitting.
Disappointment rang out loudly! The front window had all sorts of unexpected bends in the Strataglass, not the glass's fault, but my sewing! The radius of the window corners didn't match the frame close enough. So back home and make an adjustment. The side window fit great, but my disappointment trod down my plans and I forgot to take pics. But with the Port side window complete, time to work on the Stbd side. The bottom section was already complete. I'm just waiting on the arrival of that 100' of binding before continuing.

Back home, it took me about an hour or more to come up with a plan for reshaping the front window in order to eliminate the buckles in the Strataglass. My plan was to recut the curve in the top corners and restitch the binding and facing to the new edge of the Strataglass. I was very conservative as it's no big deal to remove the facing and binding and trim off more of the glass, it's a rebuild if I cut off too much.

That took about 3 hours, most of the time spent picking out the cut threads. While at it, I also added a 3 1/2" extension to the bottom front edge of the window panel as the reshape would possibly move the lower edge up slightly and it was already a tight fit. Again, having some additional material to grab when connecting the sockets to the snap bases was a worthy benefit.

Right now I'm on hold as everything I have left to do requires that binding tape.

Why did I buy the extra 100' of binding? Because I use it so much, just about everything looks better with a bound edge. In our future are full cockpit enclosure screens - they'll all have binding on every edge. I'll need even more than that 100', just watching the budget a bit after this project.

BOAT - Break Out Another Thousand.

Today is December 12th, and the Dodger has to be finished before December 29th as we actually get to take the boat out on the 30th for the New Years Eve Cruise of the HISC.

Nearly there.


Friday, December 6, 2019

Updating the Dodger - Making the Front Window

Making the Dodger Front Window

Obvious from the previous post, I took the Top down to the boat Tuesday and installed it, fit great, and I added the Buttons to the lower edge of the side strips.

Buttons on Lower Edge of Side Strips

I was concerned that there would not be enough material to pull down in order to set the buttons to the studs, I added a 2" extension on either side. I certainly helped.

On the old dodger, the side strips were the method of keeping the frame in place along with tensioning lines attached to the back of the frame and to a strap on the outside of the combing. The new rear support struts replace the tension lines, but they also fix the frame in place, so the front side strips do not have to hold the frame in place, but they do still have to hold the Side windows and the Front Window in place.

I was concerned about the accuracy of the front and side window templates, so I took them back to the boat.


Dodger Front Window Template

Here the blue painters tape holds the template material to the deck. There's a ridge on the Catalina 34 just aft of the (White box) Traveller Mounting blocks. There's a ridge across the companion way cover too.

With the template held down at the front, taped to the top of the Dodger along the top edge and the sides with pony clips, I was able to establish the boundaries of the window, along the top, the sides, and along the ridges at the bottom.


To make the Front Window, I used the template to mark the Sunbrella for the lower edge of the window panel and used the cutout to mark the Shelter-rite vinyl fabric liner.

I marked and cut out the two Leather patches that will cover the area where the lines lead through the lower part of the window panel and basted those into place on the outside of the Sunbrella

Next I added binding to the outside top edge of the lower edge.

Now the big step - Markup the Strataglass for the window. I measured it several times against the template, marking it with a grease pencil, it cuts easily with scissors.

After applying two rows of basting tape to the outside edge of the Strataglass, I basted the glass to the Sunbrella and secured it in place with my roller.

Next it was time to apply binding tape as facing tape to the inside edge of the Stratglass, again double rows of basting tape and pressed in place with my roller.

Then I sewed the two pieces together along each edge of the binding tape. They're now one piece!

Mistake: I should have sewn the Leather in place before attaching the Strataglass to the Sunbrella - it would be a lot easier to manipulate the small lower section of the window panel through the sewing machine compared to manipulating the huge piece of Strataglass joined with the Sunbrella lower section. Next time (Ha!)

So then I sewed the Leather patches in place, Peggy helped manipulate the whole thing as I steered it through the sewing machine.

With that done, I applied binding, flat, to the sides and top of the outside of the strataglass, some method, double rows of basting tape. Flipping the whole thing over, I did the same to the other side.
Now the Strataglass has a nicely finished edge near the glass. A long piece of binding was added to the outside edge all the way around. The Sailrite binding attachment works great and made the part easy. Just have to take it slow and ensure the work piece is pushed in to the exit end of the binding attachment.

The only thing left to do is add the two zippers. They were quickly basted in place and 10 minutes later they were sewn.

At this point the Window panel is finished. It only took a few minutes to test zip the window into the Top panel. Looked great! Phew!

Time for a glass of wine, or two.

I did take videos of all of this process, but somehow I screwed up with my new action camera and deleted them en bulk. Grrrrr.

I'll take video of doing one of the side windows, it's the same process.

Time to take a break until Sunday morning.

Back soon!


Thursday, December 5, 2019

Updating the Dodger - Adding Leather reinforcement for Round Holes

How to Add Leather Reinforcement for Holes in Canvas


The exact position for the Handrail Bolts through the Top of the Dodger won't be known until we do the final fitting, so my plan is to add a circular piece of Leather in the approximate area of the bolts, large enough to give an inch and a half of latitude.

The only problem is that I've never had any luck sewing leather to Sunbrella neatly!!

So I did a few practice pieces. 1st was a scrap of beige Sunbrella onto a scrap of blue Sunbrella. Pretty ugly but it laid flat.

2nd was another piece of beige, using the same method, pretty ugly, but flat.

3rd was a scrap of thin leather (from a jacket from Goodwill) really ugly, and it bunched up.

4th was another scrap of thin leather, but this time I basted it in place first, much better, no so ugly and it laid flat.

5th ditto - thin leather - but this time I sewed one stitch at a time and rotated the canvas around the needle with each stitch. Wow! This might work.

6th. ditto - but this time the patch was laying over bits of the other patches, I was trying to simulate the actual Dodger canvas top. This really did work well.

Time to try it with the real Pearl Leather from Sailrite.

I cut the piece out by marking it around the base of a small can of varnish with a pencil, then very small cuts to make a very neat circle, it's about 3" around.
Then I basted around the underside edge and a cruciform in the middle. Peeled off the paper to expose the glue and positioned it near where the bolt will pierce the canvas, moving it slightly so that the stitches and the machine walking foot will not trample on the box of a zip that is in that area.


Here's a video showing the sewing process.

Stoked!

Stbd Side - the leather patches are within a half inch of the handrail bolts - woohoo!

I need to adjust the length of the zipper for the bridge piece, it's a simple reduction of  about 1" of zipper, both of them.

The zipper setup differs from the Sailrite version. They show using a single zipper, mine has two, both start at the center of the dodger top.
That way, we can open up the bridge piece from either side to permit easier boarding with boxes or other carry-on.
The creases will disappear when I add the front and side window pieces.


This was the first of four leather patches, my finger shows where the handrail bolt is located.  Right now the handrail is fitted wrong way out. When the sides are done and the position of the handrail bolts is defined, then I'll cut the holes and reverse the handrail.

Later I'll be adding a 2nd handrail that goes from the bolt down and forward to the cabin top wooden hand rail. That should reduce the tendency for anyone to grab or lean on the canvas, they'll be able to hold onto the 2nd handrail.


Making progress.


Friday, November 29, 2019

Updating the Dodger - Construction

New Dodger Construction

Finally making some progress on the dodger canvas construction.

Initial canvas cutting, several pieces:-
  • Top
  • Aft pocket
  • Front (not including the window panel) - 8 pieces
  • Forward pocket
  • Aft Tail
That went well. A couple of notes: The sailrite video shows some edges being cut with scissors, and others cut using a hot knife, most of the scissor cut edges (zippers, binding ends) were later sealed using a hot knife and some left fuzzy as they would never be seen. I detest those fuzzy edges, so I use the hot knife whenever I can, if I do have to use scissors, I always seal the ends with the hot knife.

Again, the Sailrite video shows cutting notches for the center alignment marks, I just make a 1/8" cut with the hot knife, again, no fuzzy edges.

Then it was time to sew those pieces that were complete.

The Front panel (in which the front window will be zippered) will take a lot of strain as it holds the front window and the fronts of the side windows. I doubled up the Sunbrella (hence 8 pieces in the list above). Each of the front support strips that run from the top to the deck are two layers of Sunbrella and they were sewn first. Then the Port & Stbd Front Top Corners were sewn with the support strips sandwiched between them. 

I added binding to the inside edge of the Front panel, but was not pleased with the result. The binding was sewn through the edge of the panel, but the edge did not go all the way into the middle (fold) of the binding and at this stage I'm getting picky so I removed the binding and did it again.

Here are some pics that explain this:

Pic of Binding

This shows the canvas was not pushed deep enough into the Binding tape


Some of the binding was sewn better than other parts. To remove the binding, I used a single edged razor blade, it only took a few minutes to remove the binding, about another 15 to remove the threads from the binding itself - picky picky!


This shows how the canvas flows through the binding attachment when the canvas is held close to the entry point of the binder.

Notice how doing so, pushes the canvas away from the exit of the binder, resulting in the binding being applied closer to the edge of the canvas than is ideal.


If you zoom in, you'll see that the canvas has moved away from the right hand presser foot which is right by the edge of the binder.

The goal is to get the canvas as close the center of the binding so that the stitches are well away from the canvas edge.


Here's I'm concentrating on ensuring the edge of the canvas is pushed into the binder near the exit rather than the entry point.

Note: When sewing a concave edge, the canvas will naturally get closer to the entry point, ie. closer to the binding as it enters the binder - When the canvas is being pushed into the binding at the exit point.Pic of Binding with edge depressed


I used a new piece of binding tape when re-sewing it to the canvas. When the binding is close to the edge of a piece of canvas that has concave curves, it will require a longer length of binding tape than when it's sewn closer to the edge. Also, the binding is sewn much stronger when it's away from the edge of the canvas.

Hope this helps.

Sewing Tricks and Tips

My Sewing Tricks and Tips


Three years ago I purchased a Sailrite LSZ-1, a Zig Zag Walking Foot Heavy duty sewing machine because I knew I would have to get a lot of Canvas work done on our boat and it seemed cheaper to learn to sew than to pay someone to do it. - Nothing against the Pros that make a living from doing great work, I just didn't have the spare cash to pay that much, my labor is a major part of my value.

Basically, I've been learning to sew for 3 years, and hopefully have many more years to get even better.

Many mistakes have lead to some simple tricks and tips that I thought might help someone else, so here goes.

Tools: Invest early! When you get a tool and wonder how you ever managed without it, that's when you realize that you should get the tool as soon as you can. Some of my tools that I wish I had purchased earlier.
  • Quality Sewing Machine - I broke a cheap white machine trying to sew through 4 layers of Sunbrella. 
  • Sailrite Industrial table and Servo motor: I cannot say enough about this addition. It gives me the ability to move the needle so slowly that I can move the needle by as little as 1/16" of an inch. Remember when you first learned to drive, jerky jerky because you couldn't move the throttle finely. But then you got it. The Servo motor gives even greater control. 
  • 4' and 6' Straight edge Rulers. Best low cost purchase ever.
  • 6" x 24" Clear Acrylic Ruler - The first time you use this will hurt your shins - kicking yourself for not getting it sooner
  • 1.25" Swing away Binding attachment - they are not cheap, but they are a must. I got the 1.25" model because I detest skinny binding. So anything that needs a binding gets 1.25" binding!
  • Sailrite Canvas Patterning Ruler - there are other things to use to draw lines parallel to a marked line, but this is really good. 
  • Sewing Gauge ruler - sometimes, the Patterning ruler won't do it. 
  • Chalk Cartridge Pen Set - For canvas work, chalk is the way to go, this Cartridge pen set lets me write and mark the canvas. Don't press too hard - you'll figure that out within 5 minutes of using it.
  • Triangular Marking Chalk for Canvas - sometimes it's better, especially for marking the edge of a piece of canvas when it's laying over a tube or bench seat to be covered.
  • Hot Knife - Don't get a cheap one! It's used on every single project that is made from Sunbrella.
  • Scissors - Don't get craft scissors! They need to cut 4 layers of Sunbrella - Imagine the Bound edge of a double layer of Sunbrella - 1st choice is the Hot Knife, but sometimes you have to cut it. 

Work Space: Facebook has a very active community of people that Sew on Boats (look up SOB on Facebook) and there are a lot of folks that do their sewing where they live on their boats. For me it's in my garage, the same place I keep all my other project stuff.  It wasn't until I wanted to make a project out of White Sunbrella that I realized the risk my grubby floor might have. So I scrubbed the floor and now regularly vacuum the floor.

As my tools grew, I realized the benefit of having a tidy work space - not my norm - Now when I get supplies or tools, I find a neat place to store them, or I make a home for them. eg. I found a bunch of old chain boxes from Home Depot and used them to hold Zippers, Threads, LSZ-1 tools, Fasteners, Webbing buckles, etc. I made a holder for my Splicing kit, purchased a Harbor Freight partitioned case to hold my Grommet tools and supplies, made a canvas holder for my Snap-rite fastener tool and supplies.

Sewing Tips:
Measure carefully, make templates, account for errors in marking, double check - Measure Twice - Cut Once.

Review before applying basting tape. Basting tape doesn't grab Sunbrella very well unless it's pressed with either a Canvas Measuring rule or, a fav of mine, a wall paper hanger's Roller. But it really sticks well to Zippers, especially when pressed with a rule or roller. It's a pain to get the glue off of the zipper flange.

Before sewing: Every time that you start a stitch, check - Stitch length, Needle left/center/right position AND that the Presser Foot is lowered - you'll remember that one the first time you get a bunched  up spiders nest of thread bound up around the bobbin and on the underside of your project, worse a bent needle or even worse, damaged bobbin assembly. Lower the Presser Foot!
I now check all of those when I am about to put my foot on the power pedal.

Prewind a load of bobbins with the thread you are using - buy extra bobbins! If you do not have a pre-wound bobbin and run out of lower thread mid seam, you'll have to stop the stitching and wind a fresh bobbin - I have a 4" tall pin on my sewing machine table that I load up with bobbins wound with the thread I'm using for the project.

Before starting a stitch on a long seam that's going to be visible, make sure there is a fully loaded bobbin installed. It's annoying to have to do some reversing, which is very visible, mid seam.

Use an edge guide to keep the stitch parallel to an edge. I purchased 10 Badge Magnets from Amazon and use them as edge guides as well as holding canvas surfaces together. 

Go Slow! It's not that difficult to sew fast, the difficulty is in keeping it neat. Figure out how to go slow, there's a pride in seeing a neatly sewn seam that makes the time taken worth while.

Clean the Needle - When you sew using basting tape ( I try to keep 4 rolls on hand) the glue sticks to the needle, the thread sticks to the glue, the results can be irregular stitches, broken threads ( think visible restarting the seam) and even broken needles. I keep a tub of Chlorox wipes at hand to wipe down the needle.

Clean the eye of the Needle - Wiping down the needle to remove sticky glue residue might not clean the eye of the needle. I use a Needle Threader to clean out the eye of the needle.

Oh! The Sailrite machine uses a different style of needle from most domestic machines, the groove along the length of the needle should be on the left side of the machine. I drew a silhouette of the needle on the top of the machine to remind me which way the needle is positioned. It really mucks up the sewing if the needle is the wrong way around. The silhouette shows that the scarf where the bobbin hook passes is on the right (towards the driving wheel end of the machine)

Clean up as you go -  those little tails of thread, that you snipped off after completing a seam, can get caught up as you sew the next stitch - and, if there's a furry rug of thread snippets on the floor, that could lead to a Slip and Fall accident. Just have a bucket that you can drop the ends after cutting them rather than let them fall to the floor.

Lighten Up! - wherever you sew, make it bright! I have an LED lamp attached to the machine, LED strip lights on the ceiling, LED Strip light on the wall and another over my work bench. Being able to see the results of your work is a whole lot easier when you turn the lights on.

Folding tables are great - I have two 6' x 30" tables, one folds. If I didn't have the room for 6' tables I would get a couple of 4' even narrow if that's what would fit the work space. But they are a huge boon. Rather than struggle with a large piece of canvas trying to get it neatly into the machine, being able to support it on a table or two makes life so much easier.

That's it for now, I'll update this page as I figure or remember other tips and tricks.

Enjoy your sewing.

Paul

Wednesday, November 27, 2019

Updating the Dodger - Material Review

Material Review

I will have to update the 1st post in this series as I have updated the materials list significantly.
Having gone around this buoy, I would recommend making the templates before ordering the materials as some of the requirements were not realized until I started cutting the Canvas.

So, the changes:
  1. My original guestimate of the amount of Binding required was much less that reality. The Front and Side windows will have their top and side edges made out of binding, so I added another 40' of Bias Cut Binding.
  2. Initial plan was to use Vinyl for the anti chafe strip along the aft edge of the Dodger, my original order included 1 yd of Blue Vinyl, but reviewing the Sailrite Chafe protection video, it should have been Naugahide. Added 1 yd of Navy Blue Naugahide
  3. The front window will use nearly all of the panel of Stataglass #40 gauge window material, so I need to add 2 more panels, one for each side. Sadly the side windows take up just over half of the height of a panel, so no choice but to add a whole panel for each side. So Add 2 Strataglass #40 gauge window panels ($440 )
  4. My original Zipper size calculations were a little off, so added 4 new zippers.
All this came to over $600 Wow!!!


Working on the Aft end of the Dodger Top.
Trying to wrap my head around the aft edge.
Currently, I'm considering the layers as shown below.
Practically, the first stitch would be through the aft most edge of the Chafe Protection Strip, through the hemmed aft edge of the Sunbrella top, the two layers of the 'Tail'and the seam mark on the Pocket (Red)

That is:

  1. Chafe Protection Strip
  2. Top hemmed edge
  3. Seam mark of the two layers of the tail
  4. Seam mark of the Pocket
Then a second stitch about 3/8" up from the first

The final stitch would be at the front edge of the Chafe Protection Strip


Material Layers of Aft Edge of Dodger Top around the Aft Dodger Frame Tube.

I have already applied the Zipper to the Aft tube Pocket, but I'll take advantage of the Sailrite Support before I proceed.

Brian from Sailrite responded first thing this morning. My guess was good. So I can start sewing the back end of the Dodger on Friday, after Thanksgiving.

But today, I was able to construct the forward window support panel all except the 96" zippers that should arrive Monday.

I also finished the Aft end of the dodger components. The Pocket is complete with it's zipper, the Tail is complete except for the binding - I'll hold off doing that until the sides panels are ready and I can run the tail binding all the way forwards.

So far:

  • Top Panel is cut out
  • Front Panel is cut out
  • Front Panel inner binding is complete
  • Aft of Top Panel Tail is compete bar binding
  • Aft Top Pocket is complete
  • Forward Top Pocket is complete

Friday I'll start on the side panels.

Feel good about progress today. Understand, that between sessions of sewing I go back to the videos to make sure that my progress is heading in the right direction. I screwed up twice today making the tail, it was easy once I reviewed the video.

Moving on. At the end of the day, I cleaned up my workshop (garage) and Peggy asked that I finish the cover for our casual seat under the front window, where our adopted cat likes to loaf. It only took 12 minutes to cut a piece of fabric to size and sew the corners. Stretchy fabric is awesome! Indoors at least.

Hope the Cat likes it!

More Friday. Hope you guys have a great Thanksgiving.

Paul


Monday, November 25, 2019

Updating the Dodger - Refining the design

Refining the Design

Anyone that has watched the Sailrite video knows that it's normal to make minor adjustments to the design during construction. Well, that's true here for me too!

After cleaning up the Top template and the Front template, we discussed the cockpit venting aspect of the design. A bit of explanation is due here.

When we are at Anchor, most of the time, the boat will point into wind, unless water current is more powerful and then it's a guess which way we'll be pointing. Most of the year here in South Florida, and certainly in the Bahamas, it gets pretty warm when sat in the cockpit if the front window is fully closed. Our old Dodger design did not have a designed vent option, so we typically would unzip each side of the front window and fold it back leaving about a foot of vent on either side.
Dodger Old Design with Front Window folded open on each side.

The Front Window Zippers each began in the middle of the top.

We discussed the options to improve on that method of venting the Cockpit, one included adding a Smile, a U shaped, zippered opening in the middle of the front window. That seemed like a better solution. After waking early the next day, it occurred to me that all we needed to do was install the Zippers from the lower edge of the window to the top center. That would allow us to unzip from the top middle and fold down a portion of the window. Thinking through the concept, it would also improve visibility if the window was fogged up, with the added benefit that the opening would be the full width of the window.

Dodger New Design with Front Window folded down (open) from the top

We took the templates back down to the boat today, I was curious whether I could adjust the two back support bars to be at similar angles to each other. Turns out that was no hassle and worked out great.

With the Dodger frame set up, I held the Side Window Templates in place with some Pony clamps and adjusted the lines on the template. My concerns was that the lower edges of the side window templates were a little off line. They were! But that's why it's ok to remeasure everything, and make adjustments, just like they do in the Sailrite Video.

The initial template markings took nearly 3 hours to complete, add another hour today. In addition, today's review of the templates has given me some concern that the front window template might be a tad off and that it's not easy to establish a really good template markup due to the lower front edge of the front panel strips is really difficult to establish. My solution is to make up the Top Panel with the attached front window surround and side strips, the two side panels and take them all down to the boat for fitting. At that time I'll make a template just for the Front window panel, it should be a lot easier because the Side strips will be held in place.

One other thing I considered was adding 2 more tubes to the Dodger Frame. Whenever I'm on deck, heading back to the Cockpit, I'm always concerned that I may put some weight on the canvas Strip that holds the Front Window in place. By adding the two Forward Safety Grab rails, one on either side of the Dodger frame, that would give anyone going from the side decks back towards the cockpit something to grab before getting to the Dodger grab rail. Safety is a big factor for me and Peggy always supports safety upgrades. The two grab rails would be about 45" long, going from the existing Dodger grab rail, forwards and down to just aft of the cabin top wooden grab rails.

Dodger re-design including Forward Safety Grab Rails

Ok, now it's time to do some canvas work. A quick markup of the reviewed templates for the side panels and then out with the Hot Knife.

Well worth the trip down to the boat today! I also had the chance to clean off some of the glue residue from the shipping tape that was stuck to the Dodger Frame. My personal favorite goo remover is Goo Gone.

A quick few spritz' on the metal tube surface and spread around with my fingers, leave it for a few minutes, about 5 is normally plenty. Then rub off the goo with a rag. If there's a lot of goo to remove, a second treatment might be needed. 

It easily took the Glue goo left by the Shipping tape on the Dodger Metal Tubes and the on the Fiberglass Surfaces. Less than 15 minutes to clean it all up.


Now I'm Off to do some canvas.


Friday, November 22, 2019

Updating the Dodger - cleaning up the templates

Cleaning up the Dodger Templates

Someone asked me why I'm going into so much detail about this project, the answer is pretty simple: By making dozens of drawings, graphics and asking lots of questions, I'm actually getting down to the detailed design and construction process. I'm learning more about doing a complex project like this just by writing about it. If you want to learn something, teach it!

NOTE! All the pics and graphics can be clicked upon to view them full size.


Here's my review of the pieces that make up the completed Dodger

Dodger frame

Sketch of the Dodger Frame, the aft support is only shown on the Stbd side, but there is a second on the Port side.


Dodger Top Panel

The Top Panel has side strips that will attach to the ridge that's on the Cabin Top in front of the Companionway cover plate.

The Front Window Panel will zip into this panel and the side window panels will zip into it on each side.


Dodger Side Window Panel

Sketch of the Stbd Side Window Panel, there will be a single zipper that extends from the Aft top corner of this panel all the way forward and down to the front tip of this panel.


Dodger Front Window Panel

Sketch of the Front Window Panel.
This panel will be attached at the top and sides with two zippers. Each starting at the top center of this panel and reaching all the way to the side strips and then down to the Front Lower Edge.

The bottom section of this panel will be Sunbrella lined with Shelter‑Rite® White 61" Fabric

The top and sides will be 1.25" Bias cut Binding Tape used as a facing tape.

The Cut outs for the Running rigging lines at the lower edge will be edged with Leather.


I spent hours watching the Sailrite Videos, and then more trying to figure out the correct layering order. Using the Sailrite online Chat feature, I discussed the issues with their very helpful support team and the last one suggested that I email support with the questions.

Then I spent about an hour making up the following graphics to help explain my doubts and in the process, answered my own questions.

Here's the graphics I sent to Sailrite Support.

Dodger Front Panel Lower Edge Layers
This shows the layers that will make up the Front Lower Edge. It does not show that there will be Snaps installed along that lower edge, but it does show the Binding covering the Sunbrella Outer Fabric and the Shelter Rite Lining. The Strataglass will be sewn to the Sunbrella and the top (left in the pic) egde of the Sunbrella will be turned under and resewn. On the underside of the Front Lower edge, the Strataglass will be edged with Bias Cut Binding tape laid flat, it will cover the joint of the Strataglass and the Shelter rite lining.

Dodger Front Panel Zippered Top & Side Edge Layers

This graphic shows the layers that will form the Zippered Top and Side edges of the Front Window Panel. the lower end of this panel will have the same layers as the Front Lower Edge (previous graphic) as will the lower edge of the Side Window Panels.


Dodger Front of Top and Side Strip Layers
This final graphic shows the layers that will form the front of the Top Panel and the side strips. The lower edge of the side strips will use the same layer order as shown in the graphic (2 up from this) 

This graphic shows that the Sunbrella will be edge dwith Bias Binding Tape and the Zipper will be enclosed, out of the Sunlight. This same layer form will be used for the Zipper that extends from the aft end of the Top Panel all the way to the front, lower edge of the side panel.


Having figured out the layers for the construction, it was time to clean up the templates.

The Sailrite video show using 'Sand Bags' to help manage large templates and pieces of fabric on the work table, here's mine. They only took about 30 minutes to make all three.

Slightly smaller than the ones Sailrite describe. These are made from 8" x 16" offcuts of Sunbrella fabric and scraps of Dura Skim patterning material.


Here's my work space. I purchased a 2nd 6' Folding table just to handle this project, I'm sure it'll be used for many more.

The template on the tables in this pic is hanging off the far end by about 4 feet! and it barely fits across the two tables.


I have been working to clean up the template lines, mark the zipper locations and figure where I'll need to cut the templates and where I'll need to join them.

Just getting this part done has taken several hours.

I really understand why professionals charge so much for making a dodger, it's a lot of work!


Making progress, next it's time to start marking the fabric and cutting things out.

Update: After emailing back and forth with Sailrite, Eric Grant replied (recognize the last name?), he recommended that the Zippers around the front window panel be sewn to the Inside of the panel rather than the outside.

So here's the updated graphic showing the Front Window Panel Top and Bottom Edges

Dodger Front Window Panel Top and Bottom edges

Obviously the graphics are not to scale, but this pic shows where I'll be placing Snap-rite Buttons and Sockets to connect to the existing Snaps that are installed from the previous Dodger, there might have to be a couple of additions, any that are not used will remain in place rather than have to try and repair a hole.


Wednesday, November 20, 2019

Updating the Dodger - Creating the Template

Creating the Template

With the Modified Frame installed, time to make the template.

Heading down to the boat armed with:
  • Dura Skim - more than enough material
  • Double Sided Basting Tape  - new roll of 3/8"
  • Reinforced shipping tape - plus a spare roll
  • Grease Pencil (black)
  • Sharpies - Red, Blue, Green, Brown
  • Tape Measure
  • Note pad

Anyone doing this project on a DIY basis, should watch the How To Videos on Sailrite.com at least several times and then again a few more times. It's the concept that we're trying to figure out.

I'm planning on taking at least 2 hours probably 4 to create the template. Sailrite suggests we should use the shipping tape on the tubes as it's easier to remove than trying to remove the basting tape from the steel tubing. We know that works from making our Binnacle and Wheel cover.

The design of the dodger is not yet cast in stone, or should I say, not yet cut in Sunbrella. We'll figure that out when the template is securely in place. But the basic concept is to have four parts. Top piece that covers the top of the frame and a little way down the sides, below the grab rails. Port & Stbd side windows, and Front window. I'm using 40 gauge Strataglass, which should give us really good visibility and long lasting protection from UV. We want to have a way to vent the underside of the Dodger, either by folding a side panel out of the way or rolling up a segment of the front window.

All of the Strataglass will have Sunbrella covers underlined with 'Evolution Block-it' fabric to prevent scratching by the covers. We expect to leave the forward cover on when the boat is at the dock. The side panels will also have covers, but more for storage than when at the dock - we need Sunlight to get to our Solar Powered Vents that are under the Dodger.

The Top panel will be held in place by Zipped pockets. The side panels will be zippered to the top panel and snapped along their lower edge to the cabin top and cockpit combings. The Front panel will also be zippered to the top panel and snapped to the front of the covered area. We haven't yet decided on whether to use a single front window or a 3 part window. If we go with the single front panel window, then to vent we'll unzip from the side panels. If we go with the 3 part window, we'll have a roll up center pane which will be zippered to the top panel and the sides of the front panel. It's really a mater of how it looks and how we see them being stored below when needed. Trying to keep it simple is our goal, but the 40 gauge Strataglass requires a larger minimum diameter when rolled. It's delivered on a roll that is about 2" diameter. We'll see how this goes. I was tempted to get the 30 gauge window material, but we really like the clarity and durability of the 40 gauge.

So, how did it go?
Shipping tape and Basting tape applied to
Dodger Tubing


Reinforced Shipping tape along all the tubes, along the lower sides and along the front of the cabin top ridge.

This uses a lot of shipping tape and even more Basting tape.

But this only took about 15 minutes to complete.


The completed template overview.

It took about three hours to complete the template and we have decided on the style.

The top is going to reach about 2" below the grab rail.
The front panel will have a strip of canvas at each side that will form the connector to the side panels. It will have cut outs for the lines that are led back to the cockpit.
The front panel will also have canvas for about 6" up from the deck ridge on the cabin top, with shaped tabs where the Quad Spinlock line clutches are located. the lower edge of all panels will be lined. The front window will be zipped into the front panel along the top and down the sides of the front panel.

The Gib sheet will run outside of the side panels

The sides will zip to the top and reach down to just below the combing and aft to the new aft support bar deck hinge.

The aft edge will not be attached to the support bar, that will allow boarders to grab hold of that bar. Instead, the aft edge will be secured with tension straps to the bar.


Lower edges of Side panels to clear the Catalina 34 Logo.


The lower edge of the side panels will be snapped to the sides of the combings, and shaped to rise over the Catalina 34 Logo and run just aft of the side windows.


Side panels to clear the side cabin windows.

Despite the many snaps that already exist, we will probably have to add a few to prevent the side panels flapping against the surfaces.


Front corner of the Side panels will need snaps


The front lower corner of the side panels will need a bit of sculpting to make sure they match up nicely with the front panel.


Shore power cut out needed on Stbd side panel

The Port side panel will need a cut out for the location of the Shore Power connector.

I plan on using a straight edge to straighten the lines before using the template to mark up the Sunbrella Fabric.


Top aft rail hinge connecting Aft support bar


Boo Boo. The aft connector for the support bar on the Port side is above the old tension metal strap and the Stbd side is below the tension metal strap.

I should have noticed that when creating the template. If I lower the connector to below the metal strap, that will require that the lower deck hinge is moved aft but right now both hinges are equally distanced from the winches.

I checked the measurements and the straps are the problem, they are at different heights on both sides. So this is not a problem


Top of Front Panel

We were pretty pleased with the tension we were able to set into the template material (Dura Skim)

I marked the center line of the top tube onto the Top panel, and then applied more basting tape before setting the front panel template. Then marked the center line of the top tube onto the front panel.

We stood back and reviewed the template and decided on the position for the windows

Visibility should be greatly improved. With the Frame set at this height, 7" higher than before, and with the modified front panel design, we can see forwards much better. Peggy can see under the Dodger and I can see over it if stood up straight, and under it if relaxed. Looks like we have a plan.

Tubes after removing tape


It was easy to remove the four template pieces, but the shipping tape decided to really grab the stainless steel tubes.

We'll have to go down to the boat just to clean off the residue.

As it happens, we'll also do some plumbing to repair a dripping leak from the hot water connection to the faucet in the head - not my favorite place to work! It's Cramped.

All in all though, today was a good day, I'm very pleased with the templating process, watching those videos on line from Sailrite.com paid off big time.

Next step is to clean up the lines on the templates, decide where to have the edges and hem allowances.
We'll add a zipper to the aft edge of both side panels for future enclosure attachment.

Making progress.

Won't see you on the water for a few weeks. Now is the exciting bit - making the panels.

Monday, November 18, 2019

Updating the Dodger - Installing the modified frame


Installing the Modified Frame

Back down to the boat this morning to install the modified Dodger Frame. As expected, it was about 3" too tall. It took about a half hour to setup power (dock power failed) and cut off 3" from each side of the dodger extensions. So the additional height ended up being 7"

With the aft frame tube setup so that I can see directly beneath it and forward of the boat, the forward tube was a few inches lower than the aft tube. I fixed that by reducing the side grab rails by 1.25" and then finished the frame reinstall.

Now that the frame was back in it's correct position, it was time to mount the aft support bar. This is intended to replace the line that was used to pull back on the Dodger frame while the canvas was snapped down from the front of the Dodge frame to the cabin top. With the aft support bar in place, the line is not required and I have total flexibility on how to connect the canvas at the front.

Stbd side Aft Frame Support Bar installed.
FYI, the Combing is nearly 1" thick FGRP.


The aft support bar makes a huge difference when boarding the boat into the cockpit, much better than the piece of line that you can still see in the picture, that will come off tomorrow.

We ran out of time on the boat today, but only have the Port side aft support bar to install tomorrow. If we get that done early enough, then we can make the template. all those hours of studying Sailrite's how to videos is paying off.

Had hoped to get the template done today, but it took about 3 hours to get the frame installed. It always takes longer on a sailboat 😉

The aft support bars are 28.75" between cap ends.


Sunday, November 17, 2019

Updating the Dodger - Modifying the Frame

Raising the existing Dodger Frame.

We're modifying the Frame in order raise the top of the Dodger so that Peggy (5'6") can see under it when stood at the Helm. It also has to be high enough that it does not obscure my (6'0") vision forwards. And it has to be low enough that the boom will not touch the top when the sail is slack, topping lift loose, Vang and main sheet taught.

Cut the Frame extender and Internal splints


2 x 12" 7/8" dia. Internal Splint Tubes
2 x 10" 1" dia. Extension Tube
I had an old 7/8" Bimini Frame that I have cut bits from for various projects over the past 8 years, and it's the right diameter for the splints. I used a 4" angle grinder with Metal cutting wheels to cut  2 pieces of 12" length. They will get inserted inside the 1" Frame tube and the Extension, then they'll get Riveted into the existing Frame. The Extension tube will probably be about 7" but I'll cut them to 10 inches and check the Boom clearance, then trim their length to fit.

From the 6' of new 1" SS tubing, cut 2 pieces of 10" length, these will become the extension of the main dodger frame, joined with the existing tube using the splint cut as mentioned above.


Remove the existing dodger canvas. 

We have done this several times, some for cleaning and restitching, and other times as part of our Hurricane preparation - Note to self: New Dodger canvas must be removable for Hurricane Prep.

This is a pic of the current Dodger, note how the leading edge of the canvas is responsible for the forwards tension, the thin line at the back of the side window provides the aft tension. Also note the Dodger Tubes are wrapped in a Boat Blanket material to stop the windows getting burnt in the South Florida Summer Sun.

Remove the Grab Rail and reconnect it to the inside of the dodger - the grab rail sets the distance between the Main (aft) and Forward Dodger tube rails.

Add the Frame extension.
Internal Splint Tubes inserted Loosly into Extension Tubes

Pretty simple, at least that's my vision on this part. Just disconnect the lower Cap end from each side of the Dodger frame, Insert the 10" length of tubing into the Cap ends, insert the 12" Internal Splint into both the new extension and the bottom of the old tube.

Reconnect the Cap end to the Deck Hinge and check the height of the Dodger for Boom clearance.

Cut down the new extension tube to get to the correct height.

Once the extension height is correct, Drill the tubes and splint for Riveting. (New Titanium Drill bits!)

Internal Splint & Extension Pop Riveted
with Stainless Steel Rivets.
To make life easier, I drilled the tubes on my home Drill Press. 
3/16" Drill with Extension in Drill vice, easy.

Pop Riveted the Splint to the Extension, solid!
The other two holes will be drilled down at the boat, I don't intend to bring the frame home just to drill 4 holes.
Finally, Attach the Stainless Steel Rail Mount Hinges to either of the Dodger side rails just below the Grab Rail attachment bolts. These will eventually be part of the connector for the new tubes that reach from the back of the new Dodger down to a new deck hinge. These tubes will replace the current piece of 1/8" cord that pulls the dodger frame aft. So the new Dodger will have a sturdy rail for crew to grab as they exit the cockpit.


Stbd side of the Dodger Frame before Modification

Close up of the Stbd Side Deck Hinge before Modifying the Frame

The Extension Internal Splint would not fit inside the
ends of the Frame. So, removed the Dodger Frame from
the Boat to take home. It hung over the back of my F150

The Outside Diameter of the Splint is just larger than the
Inside Dia of the Frame.
Hence the slot along the length of the Splint.


The Splint was still a really tight fit even with
the Slot, Here the Splint has been cut to 3.5" 
1st side Extension fitted. It's a really tight fit.
No need to rivet the Extension in place.

Considering I cut the Extension with a hand held
angle grinder, it's a pretty good fit.


Extension fitted, End Cap installed.


With the Extensions and End Caps installed on both ends of the Dodger Frame, it's time to take it back to the boat and adjust the length of the Extension with the boom in it's lowest position.

Plan is to head down to the boat on Monday to make that adjustment and to create the template for the new Dodger.

We'e hoping this goes pretty quick, but will probably take a couple of weeks. At least at this time of year (it's November 17th 2019) it's pretty cool in my Garage where I do all my sewing.

Let's see how that works out.

Making progress.